If you want your garden to thrive, it is important to know the type of soil it contains. Soil type or texture, as it is also called, determines the soil’s ability to retain moisture, drain properly, and provide plants the nutrients they need. The four main types of soil are clay, sand, silt, and loam. You can learn more about each soil type in this helpful article.
In this post we will learn how to conduct simple, inexpensive tests to determine the type of soil in your garden. Once you know what soil type you have, you can amend it as needed to improve its quality and thereby improve the health and productivity of your garden.
Water Test
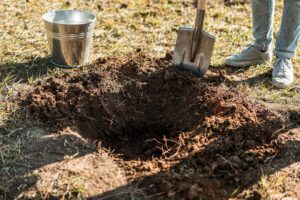
In this quick, easy test you simply need to dig a shallow hole and pour water into it. If the water is absorbed slowly, it is clay based. If it drains quickly, it is sand based.
Compression Test
Another quick and easy test involves taking a sample of soil, about a cup or so from your garden and compressing or squeezing it in your hand. Take note of how the soil holds together. If it feels somewhat sticky and remains compressed when you open your hand, it is clay-based soil. If, on the other hand, it feels gritty and crumbles when you open your hand, it is sand-based soil. But if it feels soft and smooth and holds its shape momentarily or until it is touched, then it is loam-based soil.
This article contains affiliate links. If you make a purchase using one of these links, I will receive a very small commission at no additional cost to you, and it will help me maintain this website. Rest assured, I only recommend products I actually like!
Settlement Test
The settlement test is a little more involved than the previous tests, however, it provides a more specific assessment of your soil type. You will need a clear jar, preferably with a lid. A pint size (16 ounces) or larger works well.
- Place about one cup of soil in the jar then fill the jar with water 2/3rds of the way full.
- Place the lid on the jar and shake well. If you do not have a lid, stir vigorously. Some recommend adding a drop of detergent as a surfactant to help separate the particles, but this is optional.
- Place the jar in an area where you can leave it undisturbed for at least twelve hours, preferably longer, to allow time for the particles to separate and settle. This is important because you will need to measure the layers. If the water is cloudy, it means the silt and/or clay have not finished settling. This step can take up to several days. The longer you can wait, the more accurate the test results.
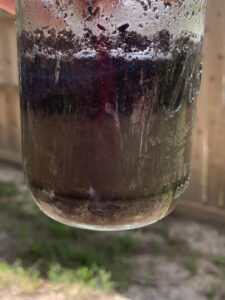
- Any sand in the soil will settle on the bottom since these are the largest and heaviest particles. The next layer will be the silt layer, followed by clay. You may see organic matter floating at the top of the water.
- Once all the particles have settled, use a ruler to measure the overall height of the soil sample in the jar, as well as the individual layers. Convert the measurements into percentages by dividing the measurement of each layer by the measurement of the overall sample and multiply by 100. For example, if one layer measures .25 inches and the overall sample was 2.25 inches then you would divide .25 by 2.25 to get 0.111, multiplied by 100 equals 11.1%.
Soil Type Results
If the first layer, which is located at the bottom of the jar, is 80% or more, the sample is deemed to be sandy soil. If the first layer (bottom of the jar) is between about 25% and 50%, and the second or middle layer is between about 30 and 50%, and the third later (top layer) is about 10 to 30%, then the sample is deemed loam or loamy soil. Or if the first layer (bottom of the jar) is 10% or less, the second or middle layer is between about 0 and 40%, and the third layer, that is the top layer, is between 50% and 100%, then it is deemed to be clay soil.
You can use the U.S.D.A. Natural Resources Conservation Service’s Soil Textural Triangle to determine the soil type. At first glance, the chart is a little confusing, but you simply use the numbers on the outside of each side of the triangle to mark percentages of each layer (clay, silt, and sand). Where these lines converge is the soil type or texture. Or, if you really want to go hard core, you can use the soil texture calculator provided by the U.S.D.A.

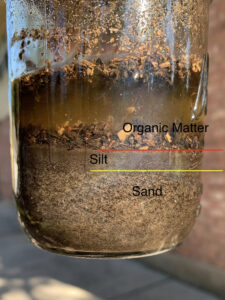
The soil sample in the picture below was taken from a flower bed. I am including it to demonstrate that not all samples have clay, silt, and sand layers. The layer below the yellow line is sand, the layer below the red line (and above the yellow line) is silt. The matter above the red line, as well as floating on top of the water, is organic matter, more specifically, mulch. There is no clay in this sample. A quick visual estimate shows this sample is predominantly sand with about 20% silt.
Now that you know the soil texture of your garden, you can add any necessary amendments to improve its texture. This article provides more information on the individual types of soil (clay, sand, silt, and loam), what can grow in each one, and how to improve the texture.
If you need to test the pH levels of your soil, you can purchase an inexpensive and easy to use soil test kit that can test the pH level and also the nutrient levels (NPK = nitrogen, phosphorus, potassium). Here is an article if you would like to more information on soil pH or on NPK.
Thank you for reading this article! If you found it interesting or helpful, please consider sharing it with others via email and social media!