As someone who loves to garden, it seems like I am always in need of more growing space. Perhaps you can relate. And because I have a container garden, the additional grow space must come in the form of containers. Last year I was looking online for ways to maximize my space using cedar planter boxes. Unlike pine, cedar is a building material that is well-suited for outdoor projects because the wood contains a naturally occurring preservative in its fibers, which makes it last longer. It is resistant to moisture and therefore decay, including decay that can occur when the wood is in contact with soil. Cedar is also better at maintaining its shape even when exposed to the elements. The problem is that lumber, especially cedar, is very expensive right now, particularly if you want to make more than one planter box.
The other potential problem I faced was that I am a gardener, not a carpenter. While I do have a few basic tools, I do not have a bona fide workshop with a chop saw. So with the high cost of cedar and limited tools, what’s a gardener to do? Enter the DIY planter box made of cedar fence pickets that is so easy to build, even a gardener can do it!
Planter Box Made With Cedar Fence Pickets
During my internet search, I came across different plans that called for cedar fence pickets instead of cedar lumber. While the pickets are thinner than the traditional lumber that you would normally use to build planter boxes, they are sturdy and much less expensive. Each of the plans I reviewed had some good elements, but also a few negative ones. So I took the strengths of each plan and modified the weaknesses. These instructions are a result of those modifications.
Amazingly, my plan calls for only eight cedar pickets. That’s right, only eight! Add in some exterior wood screws and some hardware cloth and that’s all the building materials you will need. The entire project for one planter box cost me just under $50.00. Prices in your area may vary, but the point is that it is much less expensive than using cedar lumber.
In addition to being more cost-effective, this planter is also nice-looking. All of my neighbors, plus a few strangers walking their dogs, have commented on how attractive and convenient the boxes are. While I was outside watering my plants one morning, I have even had a jogger stop to ask me about them!
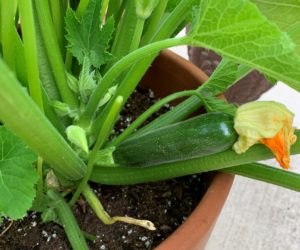
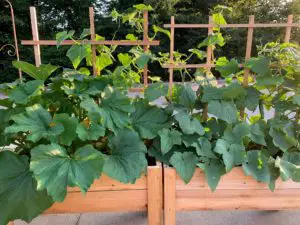
The planter boxes stand two feet tall which means I don’t have to bend over very far or get on my knees to garden, a real benefit regardless of your age or agility. I have built a total of four boxes and ended up adding trellises to three of them so that I could grow vining as well as non-vining plants in them. So far I’ve grown cucumbers, zucchini, acorn squash, Swiss chard, lettuces, radishes, celery, green onions, beets, and carrots in them. The possibilities are endless!
This article contains affiliate links. If you make a purchase using one of these links, I will receive a very small commission at no additional cost to you, and it will help me maintain this website. Rest assured, I only recommend products I actually like!
When winter hit and the temperatures were below freezing for extended periods, I was able to easily cover the planter boxes with a row cover that I secured with large clips. This spring and summer I’ll do the same thing if necessary to protect my cucurbits from the dreaded squash vine borer and other pests.
I have enjoyed these planters so much that I wouldn’t be surprised if I build a few more!

I know you are anxious to get started building your own cedar planter boxes but before you start, I strongly recommend reading the instructions all the way through to get a good feel for the project. If you are not used to reading these type of instructions, it may help to read them more than once. If it seems a bit confusing at first, take your time. If you are a visual learner like me, it may help for you to sketch out the plan as you read the directions. Once you get to the stage where you assemble the pieces, you should catch on right away. In case you are wondering, I used a program that is popular with food bloggers that allows you to print the recipe, hence the reference to recipes at the top of the article. I did this so that you would be able to easily print the instructions.
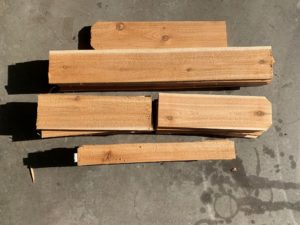
Be sure to note that fence pickets have one end where the corners are cut off. These are referred to as “dog ears.” Pay attention to the instructions so you will know which measurements go with the “dog eared” ends.
One last thought. Remember, if you are a gardener and not a carpenter, it does not have to be perfect. Just have fun and learn as you go if necessary. Then step back and admire the fruit of your labor. I have a feeling your neighbors will, too.
Thank you for reading this article! If you found it helpful, please consider sharing it with others via email or social media!
How to Build a Cedar Planter Box Out of Fence Pickets
Equipment
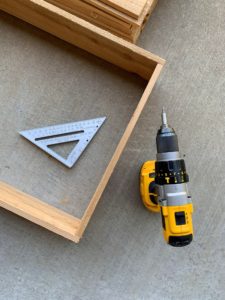
- Tape measure and a pen or pencil to mark measurements
- Carpenter's square or straight edge
- Electric drill with a drill bit that is smaller in diameter than the screws you will be using
- Phillips bit for an electric drill or a Phillips screwdriver
- Circular saw (or jig saw, hand saw, or chop saw)
- Wire snips for cutting hardware cloth
- Heavy duty stapler with staples
- Sandpaper and sander - optional
- Clamps - optional
Materials
- 8 Cedar fence pickets, each 6 foot long
- 50-60 Exterior wood screws, 1 ¼ inch with Phillips head
- 1 Hardware cloth with 1/2" holes, measuring 36" x 18"
Instructions
Cut list for the front and back, ends, and base of the planter box
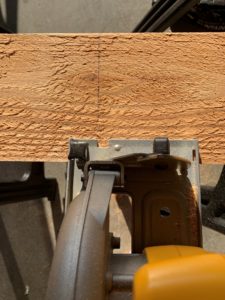
- Use a tape measure and carpenter's square or straight edge to help you make accurate measurements and cuts. Cut four pickets into three sections each that measure: 36", 18", and 18". Make sure that the "dog ear" end of the pickets are for the 18" pieces.The 36" pieces are for the front and back of the planter box. The 18" pieces without the "dog ears" are for the ends of the planter box. The 18" pieces with the "dog ears" are for the base of the planter box. The "dog ears" will allow for drainage.
Cut list for the legs of the planter box
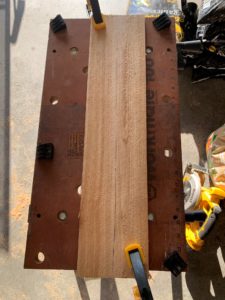
- Note: Each leg is comprised of two 24" x 2 ¾" pieces.Cut two pickets into three sections each measuring 24" long.Now cut four of the 24" pieces without the "dog ears" in half lengthwise so that each piece is approximately 24" X 2 ¾".You will have two, 24" X 5 ½" pieces with the "dog ears" leftover. I used a Workmate workbench and clamps to hold the pickets so I could make the long cuts.
For the base, bottom support rails, and inside bracing
- Cut two pickets each into two sections that each measures 36" in length. The pieces without the "dog ears" will be used as the support rails for the bottom of the planter box.Cut the other two 36" pieces with the "dog ears" into two 18" pieces each. These are for the base.Cut one of the 18" pieces without the "dog ear" into four pieces that are approximately 4 ½" x 5 5/8". These will be used inside the planter box as bracing for all four sides.You will have one 18" piece without the "dog ear" left over. Save this for when you assemble the base.
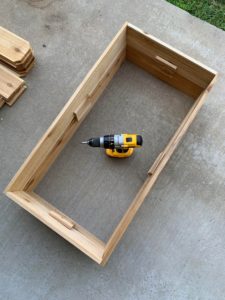
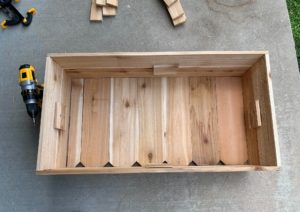
Assemble the planter box - The planter box is made up of two rectangles jointed together.
- Assemble two of the 36" pieces and two of the 18" pieces without the "dog ears" into a rectangle. You will need to make sure that the rectangle is "square", which means that the corners are all 90 degrees. A carpenter's square is a good tool to use for this. Or you can use a tape measure to measure diagonally from corner to corner. The measurements should be the same.
- When constructing the rectangles, make sure the the 18" pieces are on the inside of the 36" pieces. (See picture.) Predrill holes using the drill bit then use two screws in each piece to secure. Repeat to make the second rectangle.

- Stack the rectangles on top of one another. Make sure to align the sides, ends, and corners. Clamps can be helpful for this step.
- On the inside of the rectangles, place the 4 ½" x 5 5/8" bracing pieces over the seams where the two rectangles meet. This will secure the two rectangles together. Center each bracing piece on the seam. Make pilot holes then screw the braces to the front, back and both ends. You can drive the screws from the inside of the box as pictured or the outside as pictured in the finished product. I've done it both ways. Note, however, that if you screw them from the inside, the very tip of the screw may slightly protrude through to the other side.
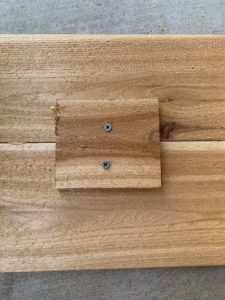
- Bracing pieces secure the two rectangles together to form the shell of the planter box
- Flip the joined rectangles over so that the side you choose to be the bottom is now on top. Place the two 36" support rails across the bottom. Drill pilot holes then secure the support rails to the rectangle using two screws in each end.
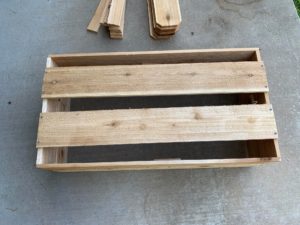
- Flip the rectangle back over so that the top of the box is now on top. Place all six of the 18" dog ear pieces in the bottom of the box. You will have a gap that is approximately 1 ½" wide. Using the 18" piece without the "dog ear" that was leftover and cut it into a strip the same size as the gap (approximately 1.5" x 18"). Place it in the gap.Secure all six of the 18" base pieces, plus the 1 ½" x 18" piece you made for the gap, to the front and back of the bottom rectangle by drilling one pilot hole in each base piece followed by one screw. This will strengthen the base of the planter and help the sides from bowing out when the potting mix is added.
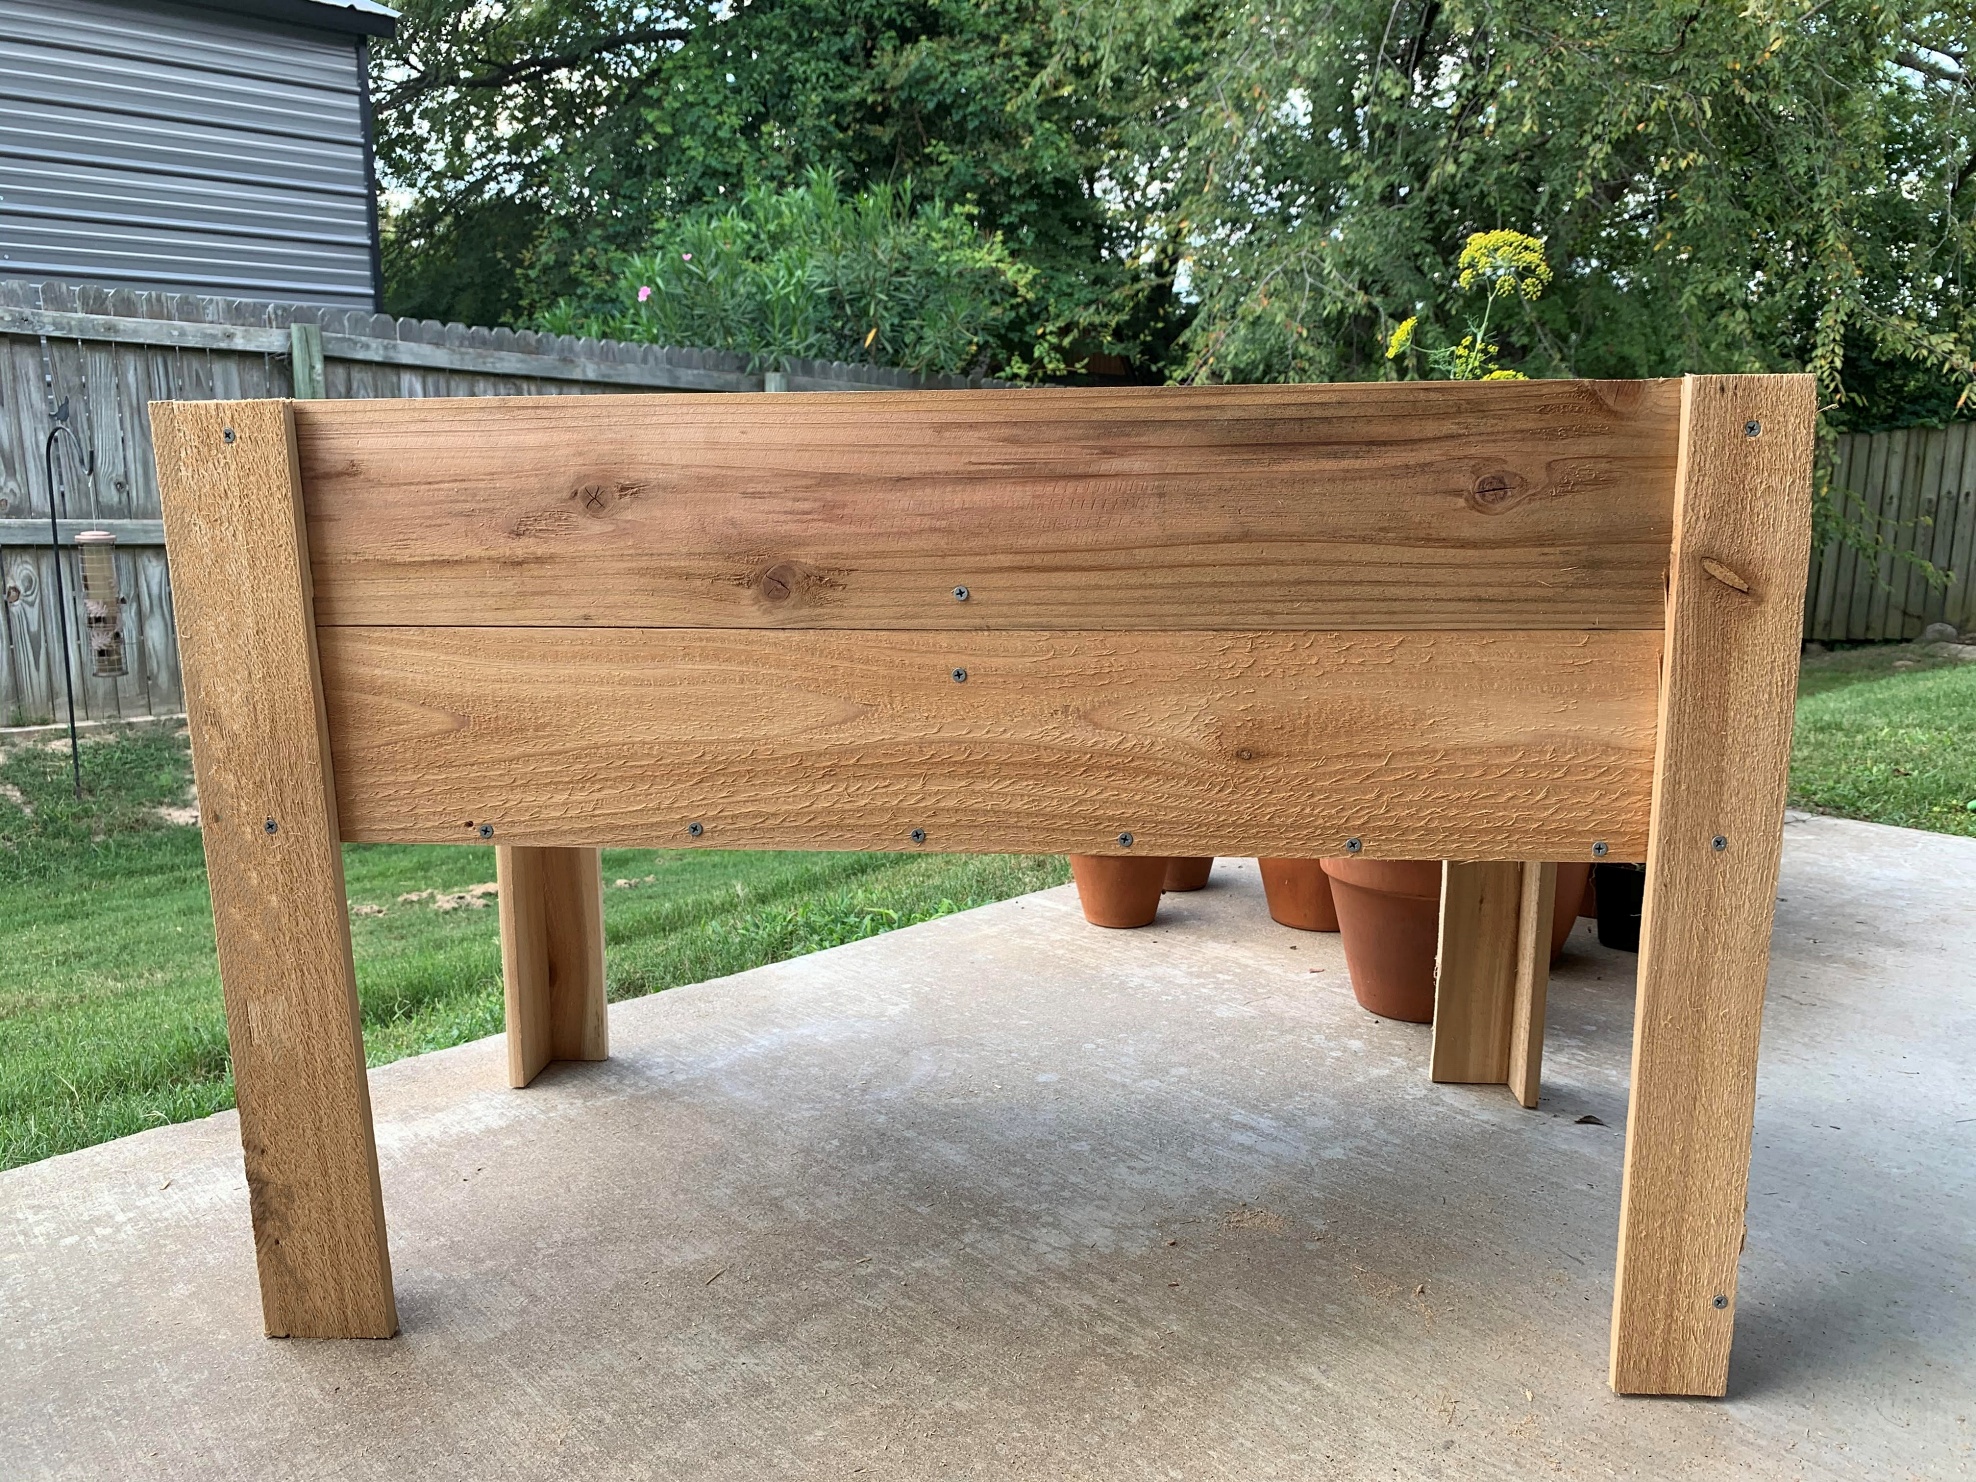
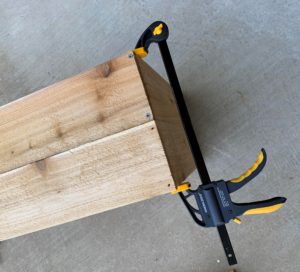
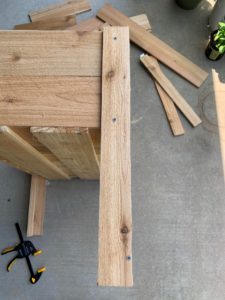
- To attach the legs, turn the planter on its side and align two of the 24" leg pieces to the top corner of the box. Make sure the leg pieces are flush. Drilling pilot holes first, screw each leg near the top and bottom of the planter. Then drill another pilot hole, followed by a screw, near the bottom of the leg so that the two leg pieces are attached to one another. Do this for all four legs. This was another step where it helped to use clamps.
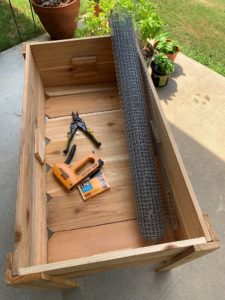
Install hardware cloth
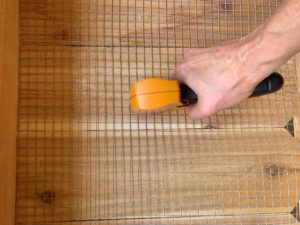
- Measure the inner dimensions of the bottom of the planter box. It will be approximately 35½" x 18". Using the snips, cut a piece of hardware cloth slightly smaller than these dimensions. You may have to work with the wire to get it over the bracing pieces. Use a hammer or other tool to help if necessary.
- Once the hardware cloth is in place, use a heavy duty stapler to secure it. The hardware cloth with help retain the soil and strengthen the box.
Finishing details
- If you are interested, you can use a sander to smooth the top edges of the planter box. The planter box needs to drain so Do Not add a plastic or cloth liner to the box as this will cause the soil to retain too much water. You may also desire to apply a sealer to the exterior surface of the planter but it is not necessary since cedar weathers well. Do not apply sealer, paint, stain, etc. to the inside of the box so that it does not leach into the soil. The screw points may protrude through the wood in some places. You may use a rotary cutting tool or other tool to remove the sharp points if needed.
Fill the planter with potting mix
- Place the planter box where you would like for it to go then fill it up with soil. Once you fill it with soil it can still be moved by two people, but it will obviously weigh more.
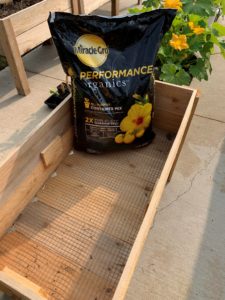
- This planter box holds approximately three large bags of potting mix or about 75 quarts. The soil will settle over time so you may want to add a bit more to compensate for this.
Congratulations!
- You did it! Take a picture of your accomplishment and tag me on Instagram @okra_in_my_garden so I can congratulate you!I added a simple trellis to mine and grew cucumbers!