Turnips are members of the brassica family, and therefore, better suited to the cooler weather of spring and fall. This root crop is often considered to be a sweeter and less starchy substitute for potatoes. Turnips, like carrots and other root crops, can easily be grown in containers or raised beds.
How to Plant Turnips
Turnips grow best in loose, well-draining soil that is free of debris so that there is no resistance or obstacles impeding their subterranean development. They prefer a slightly acidic soil pH of 6.0 to 7.0.
This article contains affiliate links. If you make a purchase using one of these links, I will receive a very small commission at no additional cost to you, and it will help me maintain this website. Rest assured, I only recommend products I actually like!
The soil temperature must be at least 40o F (4o C) for seeds to germinate, but the crop thrives at temperatures between 50o F and 70 o F (10o and 21o C).
For spring turnips, direct sow seeds outdoors three weeks before the last expected frost date. For fall turnips, direct sow seeds about two months before the first frost of winter. Some advantages of growing turnips in the fall include a sweeter taste and less pressure from insects as the winter approaches.
Plant seeds 1/2 inch (1.25 cm) deep and 4 to 6 inches (10 to 15 cm) apart. It takes between one and two weeks for the seeds to germinate. When the plants reach 2 to 4 inches (5 to 10 cm) tall, thin them so that they are between 3 and 4 inches (7.5 and 10 cm) apart. If planting in containers, the pot must be at least 10 inches (25 cm) deep. You can grow 9 turnips in a container that is 12 inches (30.5 cm) in diameter or the same amount in one square foot of space if growing in raised beds or if using the Square Foot Gardening method.
You can also do what is called the “multi-sow” method, which entails planting three seeds together and allowing the seedlings to grow without thinning. As the turnips develop, they will push against one another. The largest of the turnips can be harvested first, while the remaining two are left to grow bigger. The multi-sow method is also used with beets. The result will be smaller turnips but a higher yield in the same space.
If you want a continuous harvest, plant more seeds every two to three weeks throughout the growing season, keeping the maturity date and the frost date in mind for a fall crop or the warming temperatures for a spring crop.
Be mindful not to plant turnips next to other root crops if growing in raised beds since they may compete for the same nutrients.
Sun and Water
Turnips do best with a minimum of six hours of full sun. They can, however, tolerate a bit of shade.
You will need to keep the soil moist (but not soggy) because turnips will become bitter and woody if the soil is dry. What’s more, if the soil moisture content fluctuates too much, the turnips will crack. If stressed by inadequate watering or temperatures that are too high, turnips will bolt, that is, go to seed and become woody. Thus, it is important to keep the plants consistently moist throughout the season. You can add mulch to the soil to help preserve moisture.
Fertilizer
As long as you sow turnips seeds in healthy, organic soil, you may not have to add fertilizer. That’s because they grow so quickly! Nevertheless, you can use a liquid fertilizer that is higher in phosphorus and potassium than it is in nitrogen because the former macronutrients help with root development, while the latter is geared more toward leaf development. This is the fertilizer that I use for root vegetable crops.
Harvesting the Turnip Root
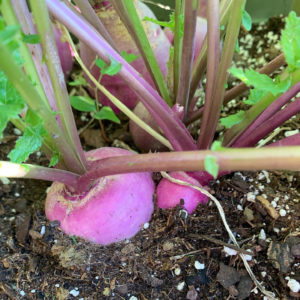
Turnips are ready to harvest after about sixty days. Keep in mind that bigger turnips do not mean better turnips. In fact, bigger turnips make for bitter turnips! The root will become woody as it increases in size. It is best to harvest turnips when they measure between 2 and 3 inches (5 and 7.6 cm) in diameter or as early as 45 days so that they will be more tender and flavorful.
To harvest, hold the exposed portion of the turnip root and twist until the taproot is released. This is especially important to do if you used the multi-sow method. It allows you to extract one turnip with minimal disturbance to its neighbors.
For colder climates, turnips can remain in the ground because the plant will go dormant. You will need to add mulch to help prevent the ground, and therefore, the turnips, from freezing.
Harvesting the Turnip Greens
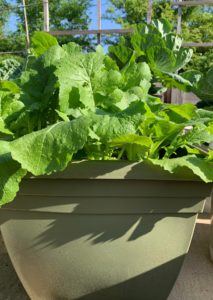
Like mustard greens, the leafy tops or “greens” of the turnip plant are edible. If you are growing the plant only for the greens, there is no need to thin out the plants after they have sprouted. If you want to harvest both the leaves and the root, it is best to remove no more than 1/3 of the leaves per plant because the leaves are necessary for root development. Allow approximately two to three weeks for new leaf growth to develop before harvesting again. Harvest the leaves once they have grown to about 10 to 12 inches, starting with the outer, more mature leaves.
Diseases
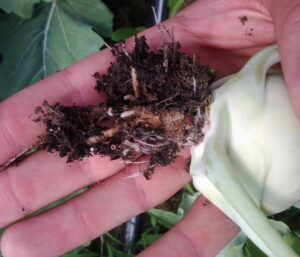
Club Root is a fungal-like disease found in turnips, broccoli, and other brassicas It is characterized by yellow and or wilted leaves, stunted growth, and malformed roots marked with galls. In turnips, the taproot and secondary roots are what are primarily affected. Unfortunately, the only way to confirm the disease is to uproot the turnip. Diseased turnips need to be destroyed to help control the spread. A soil pH of 6.0 or higher can help fight clubroot disease.
If your turnips develop clubroot, do not plant members of the brassica family in the same soil because the spores will remain for several years. If growing in a container, it is best to bag the soil and throw it away. Clean the container with a bleach solution consisting of 1 part bleach to 9 parts water. (You can learn more about disinfecting containers and related items in this helpful post.) Do not compost, as most piles do not maintain high enough temperatures to kill pathogens.
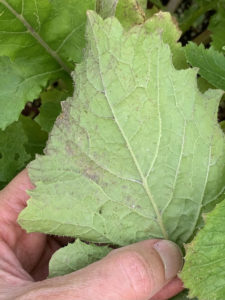
Powdery Mildew is a fungal disease characterized by white, powder-like spots that develop first on the tops of leaves, while Downy Mildew is a fungal-like disease that starts as grey spots on the underside of leaves. Both diseases can kill the host plant as well as spread to other plants. You can learn more about powdery mildew, including its treatment and prevention, in this article, as well as that of downy mildew in this article. If you want a quick read on how to distinguish between the two, you can read this.
Anthracnose disease is a fungal disease that is characterized by small, round, yellow to gray lesions. A severe infection will kill the leaf, and if the disease gets into the turnip, it will cause it to rot.
To treat anthracnose, remove diseased leaves and throw them away. Do not compost them. Treat the plant with neem oil every 7 days. This is the neem oil I use because it is pure, cold-pressed, and contains the naturally occurring compound, Azadirachtin, which makes it much more effective. Follow package directions for application. You can learn more about how to identify and treat the disease in this article.
To help prevent anthracnose, remove weeds in and around your garden as these are hot spots for spores. It is important to practice crop rotation and to refrain from overwatering your plants.
Cercospora Leaf Spot is characterized by small, round or angular-shaped lesions that have maroon or purple borders with gray to brown centers. The lesions may also have a yellow “hallow” around the border. Coloration may vary somewhat depending on the species and host plant.
As the disease progresses, the lesions will spread, and a gray or purple fuzz will appear. This is problematic for crops like spinach, Swiss chard, and turnip greens, which are grown for their edible leaves. If left untreated, leaves will often shrivel and fall off. Lesions can spread and connect with other lesions and cover the entire leaf making photosynthesis difficult, if not impossible. The plant will eventually die. You can learn more about this disease and how to manage in this article.
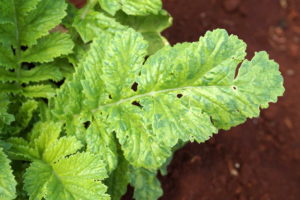
Turnip Mosaic Virus causes a variegated yellow and pale green mosaic lesion on the host plant. The leaves will develop brown spots as the plant tissue dies. This virus can diminish crop yields.
The best way to prevent this virus is to control aphids, which are known vectors. So be sure to treat these tiny sap suckers when you first spot them. Like other viruses, turnip mosaic virus spores are found among weeds. Thus, it is important to keep a weed-free garden. You can also plant varieties that are resistant to this disease.
Pests
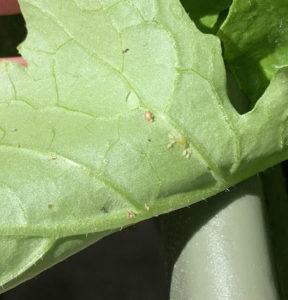
Aphids are tiny, soft-bodied insects that live on stems or the underside of leaves. They secrete a sticky substance on plants, known as honeydew, that attracts ants. They are vectors for other diseases that may affect turnips, like the previously mentioned turnip mosaic virus. In addition, they suck the sap out of the host plant, depriving it of the nutrients it needs and resulting in leaves that curl or are misshapen, turn yellow, and wilt. You can learn more about aphids and how to get rid of them organically, in this article.
Flea beetles describes a wide range of small beetles that chew irregularly shaped holes in leaves. Flea beetles are characterized by powerful hind legs that enable them to jump like a flea, hence the name. They are often metallic black in color but can also be brown, green, tan, striped, or spotted. They can make quick work out of a turnip plant, so it is best to begin treatment when you first see signs of trouble. To learn more about these destructive little beetles and how to get rid of them organically, check out this article.
Cabbage root maggots are the larval stage of a dark gray fly that is smaller than the traditional housefly. The flies lay their eggs at the base of plants or seedlings, where the hatched maggots will feed below the soil’s surface on the roots. They have an affinity for a wide variety of vegetable plants including, cabbages, radishes, carrots, onions, broccoli, cauliflower, and of course, turnips.
The damage root maggots inflict causes leaves to yellow and wilt, especially during the heat of the day, and stunts the plant’s growth. The plant will die if the maggots eat through the taproot. The turnip may have evidence of maggot tunnels.
To prevent root maggots, use row covers to keep the flies from gaining access to the plant. Diatomaceous earth, applied at the base of seedlings and more mature plants, can deter flies from laying eggs. You can learn more about this pest in this helpful article.
Cutworms are small gray or brown caterpillars one to two inches in length that curl up and hide under the surface of the soil. They may or may not be marked with spots or stripes. These nocturnal eaters are the larval stage of various moths. They cut down seedlings and plants at the soil level, and they also cause considerable damage by feeding on roots and leaves. They can burrow into root vegetables, making them inedible. You can learn more about these destructive caterpillars and how to get rid of them organically, in this article.
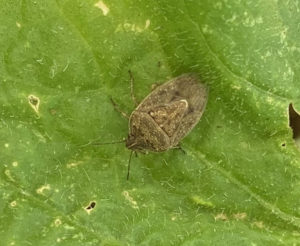
Shield bugs, also known as stink bugs, are insects whose bodies are in the shape of a shield. They are typically mottled brown, although green shield bugs are no stranger to the garden. They suck the sap out of stems and leaves, and they feed on fruits and vegetables. When they feel threatened, they will emit a liquid that smells bad. Although uncommon, they can also bite pets and humans, which can cause pain and swelling.
To prevent infestations, remove garden debris, weeds, and other places where they may overwinter. To treat, mix 1 to 2 teaspoons of pure, cold-pressed neem oil (this is the one I use), 1/2 teaspoon of Castile soap, and 1 quart of water. Always do a spray test on a leaf in the early morning or early evening otherwise the sun and neem oil could cause the leaves to burn. After the test spray, wait 24 to 48 hours to see results before spraying the rest of the plant. Monitor the plant and apply every seven days or so. This is the sprayer I use.
Varieties
Turnips come in many varieties. Some are resistant to certain diseases and pests. Choose one that meets your growing situation and preferred use. Here are some of the more popular varieties:
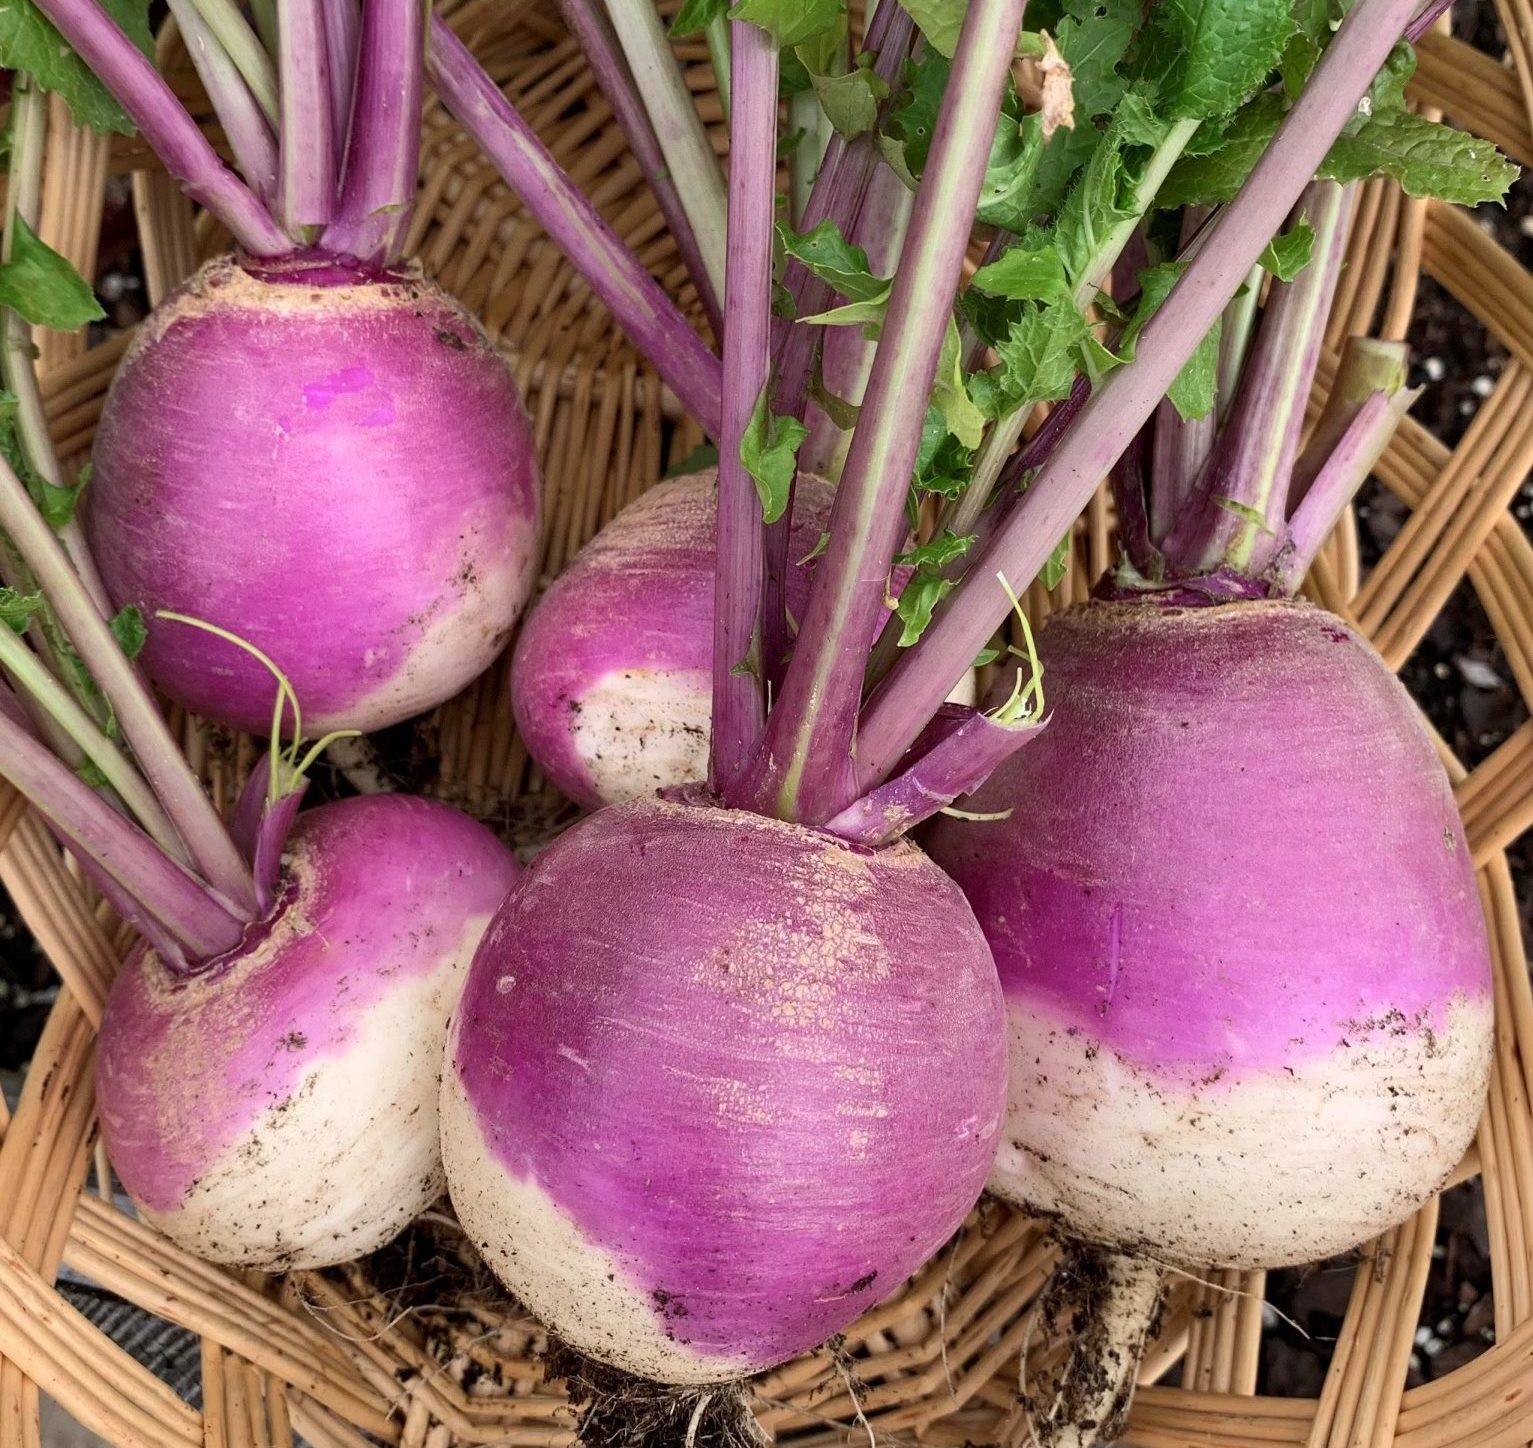
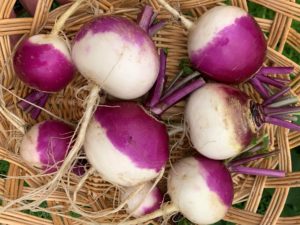
Purple Top and Purple Top White Globe are the most popular turnip varieties. They are easy to grow and can be harvested in about 45 to 55 days.
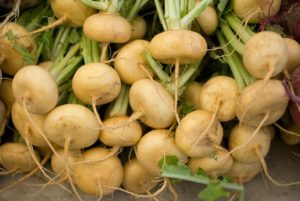
Golden Ball is an heirloom variety that matures in about 60 days. The flesh is yellow to orange in color and somewhat sweet with an almond aftertaste. They should be harvested when they are about the size of a golf ball.
Scarlet Queen turnips are red on the outside and white on the inside. They mature in about 45 days and are said to be slower to turn woody
Tokyo Cross are white turnips that mature in as little as 30-35 days. They are slower to turn woody and less likely to bolt than other varieties
Shogoin variety offers the best of both worlds in that it has broad greens that are mild in flavor with a good root as well. These dual-purpose turnips mature in about 45 days.
All Top (also referred to as Alltop), Topper, and Seven Top are good choices if you are looking to grow turnips for their greens. They grow and resprout quickly after the leaves have been harvested. The turnip roots of the All Top and Topper are small but edible, whereas the Seven Top does not develop an edible root.
Whether you prefer to eat the greens, the root, or both, turnips are an easy and fun crop to grow!
Thank you for reading this article! If you found it helpful, please consider sharing it with others via email and on social media!
To achieve the best results when planting turnip greens in the autumn, I recommend doing so approximately four weeks before the first frost.
Thanks for reading and for weigning in!